A Color Experiment
A while back I was made aware of an
article on DPReview.com entitled Reducing Contrast Without the ColoursFading (using GIMP) wherein Tom Axford talks about the need for reducing the contrast in or otherwise brightening an image to make it
look better in print. His original technique involved using an HSV model to make adjustments to a value layer without affecting the saturation of the colors in an image.
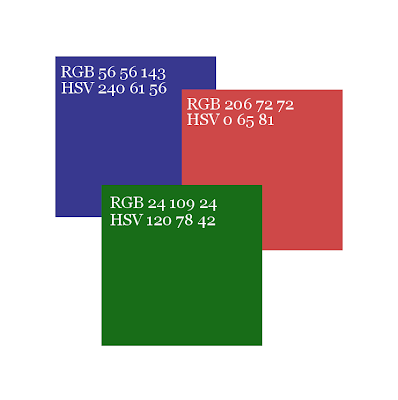
Intrigued by the concept, I decided to perform an experiment to see exactly what effect brightness and contrast adjustments have on colors. I created three squares, one each of red, green, and blue — red being lighter, green being darker, and blue being of medium intensity.
After making a copy of this layer, I
chose Colors > Brightness-Contrast and turned the brightness up by 30. The result was that as the brightness went up, the saturation of the colors went down.
With another copy of the original layer, I chose Colors > Brightness-Contrast and turned the contrast up by 30. This time each color changed a different way. The bright red became brighter and more saturated. The dark green became darker and more saturated. The medium blue stayed the same brightness, but also became more saturated.
I then used Axford's Value Layer technique to perform similar brightness and contrast adjustments.
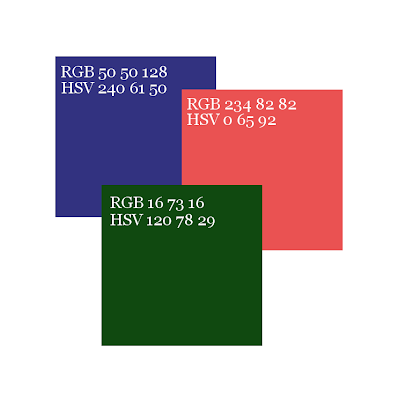
I created a value overlay on a copy of the original layer, selected it, then chose Colors > Brightness-Contrast and turned the brightness up by 30. This time the colors got brighter, but the color saturation stayed the same.
Then I created another value overlay on a copy of the original layer, selected it, chose Colors > Brightness-Contrast, and turned the contrast up by 30. The red got brighter, the green got darker, and the blue stayed the same
intensity, while the color saturation did not change.
The same sorts of effects and
differences will be seen when using either the Levels Tool or the Curves Tool on the original image versus on the value layer.
I have found that I prefer using the
Value Layer
technique on some of my photos because it doesn't affect the color saturation. I can always tweak the saturation afterward if I want to.
The Value of an Image
Here's a quick tutorial on how to use Axford's original Value Layer
technique. Note that there are several other methods that can be used to achieve the same result.
Step 1 — Break the Image into Hue, Saturation, and Value Components
Load your image into GIMP and do any
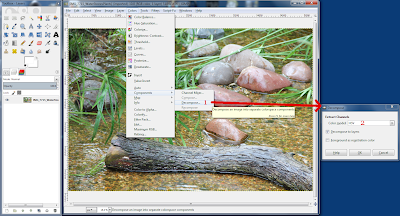
initial processing that does not involve brightness, contrast, level, or curve adjustments. Then select Colors > Components > Decompose [1] and choose HSV as the Color model [2]. When you click OK, a new image window
will open containing three layers, one for each of the hue, saturation, and value components of the image.
Step 2 — Create a Value Layer
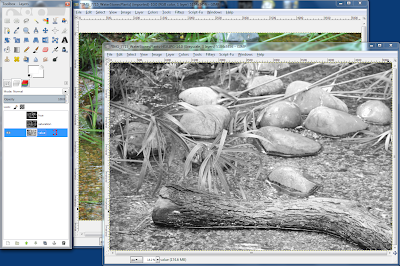
Select the value layer, which looks
like a grayscale version of the image and is identified by the word “value” in the Layers list, and copy it (CTRL+C) [3].
Delete the new window and return to the original image. Paste (CTRL+V) the value copy. It will appear as a layer named Floating Selection (Pasted Layer). Either right-click on it and select To
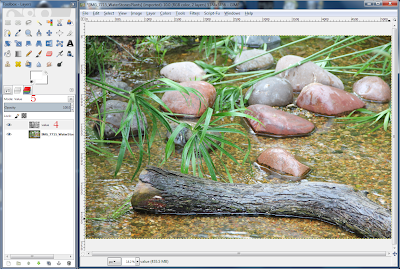
New Layer or double-click on it and name it “value”. Make sure the “value” layer is above the original image layer in the Layers list [4]. Change the Mode of the “value” layer
to Value [5].
Step 3 — Adjust the Value Layer
With the “value” layer selected,
open whichever tool you prefer to use to adjust brightness and contrast. Remember that this layer is a grayscale layer, so only tools that operate on grayscale images will be useful. When the image
has been adjusted to your satisfaction, right-click in the Layers dialog and choose New from Visible. This will combine the visible layers into a new layer named “Visible” that you can now
process further. For example, you may wish to adjust the saturation or sharpen the image a bit. (See A Non-Destructive Adjustable Way to Sharpen a Photo for a handy sharpening technique.)
A Note About Sharpening
For those who like to use Unsharp Mask, Axford has stated:
“Since writing my article on dpreview.com, I have discovered that it is generally better to apply USM to the value layer before flattening the image. The amount of USM applied is a matter of taste, but after a substantial brightening of the image, its contrast is inevitably reduced, for the highlights at least, and considerable sharpening is often needed (because the human eye perceives detail best for high contrast images; low contrast images look rather soft). I use USM quite a lot for local contrast enhancement with a large value of the radius parameter and a small value for the amount parameter, then follow it with a more conventional application of USM with a small radius parameter and larger amount parameter.”
Adjustment Example
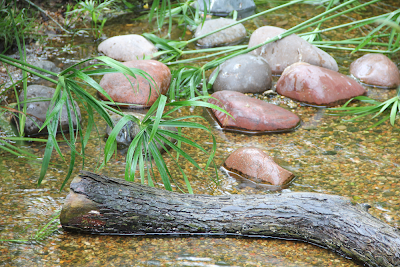
This original photo is quite bright
with poor contrast.
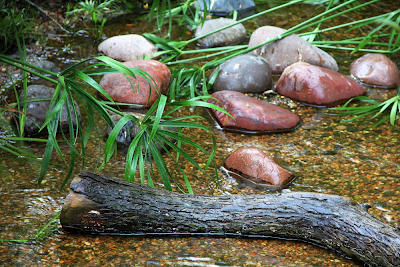
This image is a result of using the
Curves Tool on the original image. Note how much the saturation has changed.
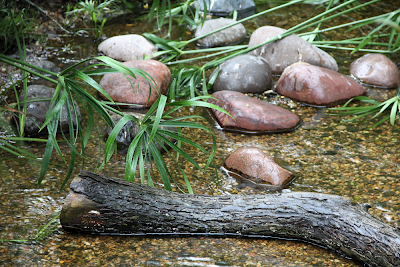
This image is a result of using the
same adjustments in the Curves Tool on a Value Mode layer over the original image. Note how the image has been darkened without affecting the color saturation.
Addendum
An easier method than breaking the image into its HSV components is to simply duplicate the image to a new layer and change the layer Mode of the topmost layer to Value, then make brightness and contrast adjustments to the topmost layer.


No comments:
Post a Comment